Effortless Spider Plant Propagation: Your Ultimate Guide
Table of Contents
- Understanding Your Spider Plant: The Basics of Spiderettes
- Why Propagate Spider Plants? The Benefits
- When is the Best Time to Propagate?
- Essential Tools and Materials for Propagation
- Method 1: Water Propagation – The Classic Approach
- Method 2: Direct Soil Propagation – Simple and Effective
- Method 3: Mother Plant Propagation – The "Still Connected" Method
- Method 4: Moss Propagation – An Alternative for Rooting
- Troubleshooting Common Propagation Issues
- Caring for Your Newly Propagated Spider Plants
- Conclusion: Grow Your Green Oasis
Understanding Your Spider Plant: The Basics of Spiderettes
Before we delve into the "how-to," it's crucial to understand what you're working with. Spider plants are renowned for producing "babies" or "plantlets" that dangle from long, arching stems. Botanically speaking, these stems are called **stolons**, and the miniature plants at their ends are known as **spiderettes**. These spiderettes are essentially clones of the mother plant, genetically identical and ready to grow into new, independent plants. The stolon may also produce small, white flowers before the spiderettes fully develop. While these flowers could potentially get pollinated and produce seeds, propagating from seeds is a much slower and less common method for spider plants. For the purpose of multiplying your plant efficiently, we focus on the plantlets. As many experienced gardeners in communities like r/houseplants (which boasts over 327k subscribers discussing growing, maintaining, and propagating houseplants) will attest, "Not done anything with the flowers, but the bits that look like miniature plants are very easy to propagate." This ease is precisely why spider plant propagation is so popular.Why Propagate Spider Plants? The Benefits
The reasons to learn **how to propagate spider plant** are plentiful: * **Expand Your Collection:** Turn one plant into many, effortlessly filling your home with more greenery. * **Share the Joy:** Propagated spiderettes make fantastic, heartfelt gifts for friends, family, and neighbors. * **Cost-Effective:** Why buy new plants when you can grow them for free? * **Educational:** It's a fantastic way to learn about plant biology and the propagation process, fostering a deeper connection with your green companions. * **Plant Health:** Sometimes, taking spiderettes off the mother plant can encourage the mother plant to produce more foliage or even more stolons.When is the Best Time to Propagate?
Spider plants are incredibly tolerant, and you can propagate them almost any time of year. However, for the best success rates, it's often recommended to propagate during the plant's active growing season, which is typically spring and summer. During these warmer months, plants have more energy for root development. Look for spiderettes that are at least 1-2 inches in diameter and have developed small aerial roots or root nubs at their base. These nubs look like tiny bumps or even short, white roots already forming. The larger and more developed the spiderette, the higher its chances of successful rooting. If you just found a big spider plant near your house and it had developed small plantlets, as one gardener shared, that's a perfect opportunity to start!Essential Tools and Materials for Propagation
Before you begin, gather these simple items: * **Sharp, Clean Scissors or Pruning Shears:** Essential for making a clean cut. Clean tools prevent the spread of disease. * **Water (for water propagation):** A clear glass, jar, or small vase. * **Potting Mix (for soil propagation):** A well-draining, general-purpose potting mix. * **Small Pots (for soil propagation):** Pots with drainage holes, typically 3-4 inches in diameter. * **Damp Sphagnum Moss (for moss propagation):** If you're experimenting with this method. * **Optional: Rooting Hormone:** While not strictly necessary for spider plants, it can sometimes speed up root development. * **Optional: Small Rocks:** For water propagation with added stability.Method 1: Water Propagation – The Classic Approach
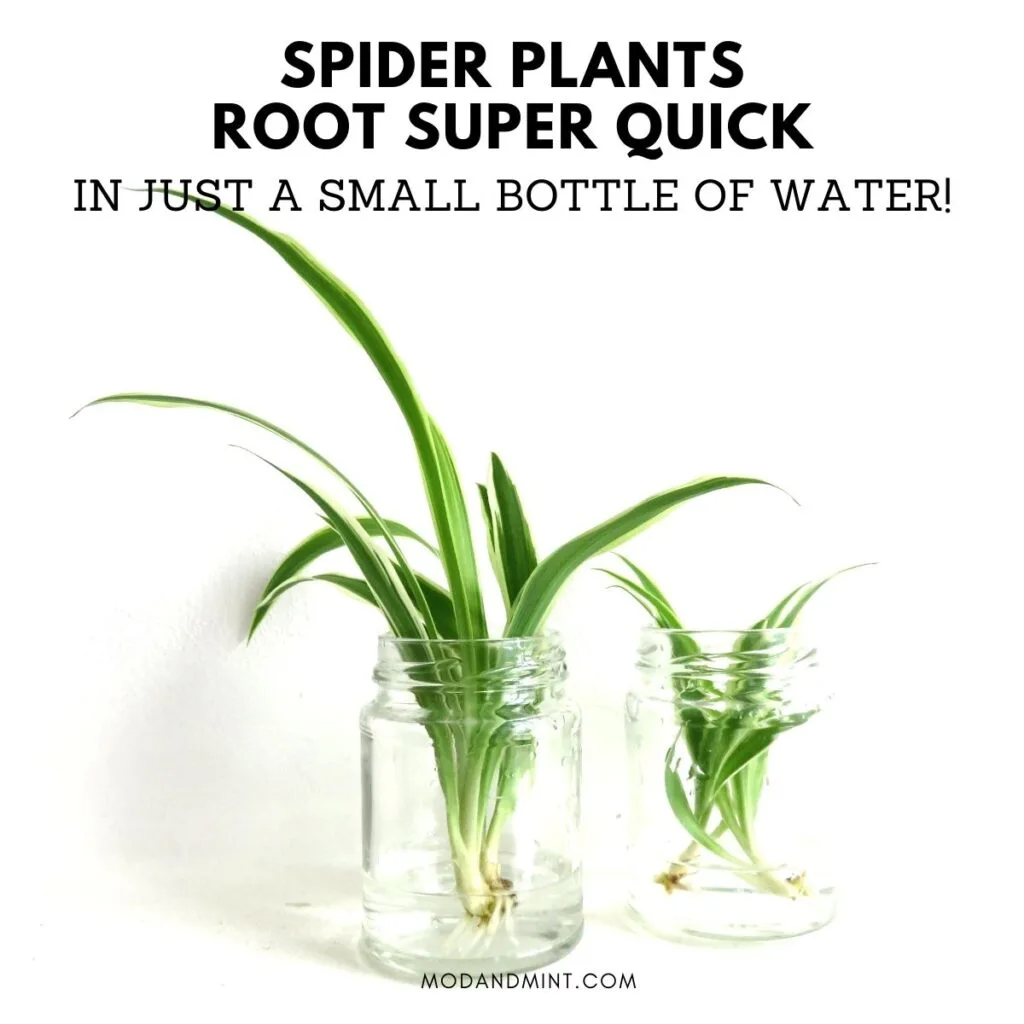
Water propagation is perhaps the most popular and visually satisfying method for **how to propagate spider plant** babies. It allows you to watch the roots develop, which can be incredibly encouraging, especially for beginners.Step-by-Step Water Propagation
1. **Select Your Spiderette:** Choose a healthy, well-formed spiderette that has started to develop small root nubs at its base. The larger and more robust the plantlet, the better. 2. **Make the Cut:** Using your clean, sharp scissors or shears, cut the stolon about an inch or two above the spiderette. You want to ensure you're only cutting the stolon, not the plantlet itself. As one gardener noted, "The only ones that haven't made it were usually poorly cut/separated from the plant (oops) or have smaller, thinner leaves." A clean cut minimizes stress on the plantlet. 3. **Prepare the Container:** Get a clean glass, jar, or vase. Fill it with room-temperature water. 4. **Place the Spiderette:** Submerge only the base of the spiderette (where the roots will emerge) into the water. Ensure the leaves remain above the waterline to prevent rot. 5. **Location, Location, Location:** Place your container in a spot with bright, indirect light. Avoid direct sunlight, which can overheat the water and stress the plantlet. 6. **Change the Water:** Change the water every few days, or at least once a week, to keep it fresh and prevent bacterial growth. 7. **Wait for Roots:** Within 1-3 weeks, you should start to see white roots emerging from the base of the spiderette. Let the roots grow to about 1-2 inches long before transferring to soil. This usually takes 2-4 weeks.Water Propagation with Rocks
Some gardeners find that adding small rocks to the water container can provide stability for the spiderette and create a more natural environment for root growth. As the "Data Kalimat" suggests, "Get a nice jar, and fill with small rocks, and water. You can leave spider plant babies resting on the rocks, and they will root into the water, and you can transfer into soil." This method works by allowing the spiderette to sit just above the water level, with its base touching the water, encouraging roots to grow down into the water around the rocks. It's an aesthetically pleasing alternative to simply suspending the plantlet.Method 2: Direct Soil Propagation – Simple and Effective
Direct soil propagation is another highly effective method for **how to propagate spider plant** babies, and it's often preferred by those who want to avoid the extra step of transferring from water to soil. Spider plants are very tolerant, making this a viable option.Step-by-Step Direct Soil Propagation
1. **Select Your Spiderette:** As with water propagation, choose a healthy spiderette with noticeable root nubs. 2. **Make the Cut:** Cut the stolon about an inch or two above the spiderette using clean, sharp scissors. 3. **Prepare the Pot:** Fill a small pot (3-4 inches in diameter) with a well-draining potting mix. Make a small indentation in the center of the soil. 4. **Plant the Spiderette:** Place the base of the spiderette into the indentation, ensuring the root nubs are covered by soil. Gently firm the soil around the base to provide support. Do not bury the leaves. 5. **Water Thoroughly:** Water the soil immediately after planting until water drains from the bottom of the pot. This helps settle the soil around the plantlet. 6. **Provide Humidity (Optional but Recommended):** To help the plantlet acclimate and reduce transplant shock, you can cover the pot with a clear plastic bag or dome to create a mini-greenhouse effect. Just ensure there's some airflow to prevent fungal issues. 7. **Location:** Place the pot in a spot with bright, indirect light. 8. **Maintain Moisture:** Keep the soil consistently moist but not waterlogged. Check the soil every few days by sticking your finger about an inch deep; if it feels dry, it's time to water. 9. **Rooting Time:** Roots should establish within 2-4 weeks. You'll know it's rooted when you feel resistance if you gently tug on the plantlet. "I usually plant directly in soil," shared one gardener, noting that "perhaps 1/3 don't make it, I suspect my cat pulls them out and they lose contact with the soil." This highlights the importance of stability and keeping pets away during the rooting phase.Method 3: Mother Plant Propagation – The "Still Connected" Method
This method is incredibly easy and leverages the mother plant's support system, making it highly successful. It's ideal if you have space near your mother plant to place a small pot. "You can propagate them while they're still connected to the plant, if you can manage to get a pot with soil sitting in the right position," shared a gardener who used to do this all the time. 1. **Prepare a Pot:** Fill a small pot with fresh potting mix and place it next to the mother plant. 2. **Position the Spiderette:** Take a healthy spiderette that is still attached to the mother plant via its stolon. Gently rest the base of the spiderette onto the soil in the new pot, ensuring the root nubs are in contact with the soil. You can use a paperclip or a small piece of wire to gently hold the spiderette in place, if needed, but often its own weight is enough. 3. **Water:** Water the soil in the new pot. 4. **Maintain Moisture:** Keep the soil in the new pot consistently moist. The spiderette will continue to receive nutrients and water from the mother plant while it develops its own root system. 5. **Sever the Connection:** After 4-6 weeks, or once the spiderette has clearly established a robust root system (you'll feel resistance when you gently tug, or see new leaf growth), you can cut the stolon connecting it to the mother plant. Your new spider plant is now fully independent!Method 4: Moss Propagation – An Alternative for Rooting
While less common than water or soil, some enthusiasts experiment with other mediums. "Recently I've started experimenting with damp moss," one gardener mentioned. Sphagnum moss provides excellent moisture retention and aeration, which can be beneficial for root development. 1. **Prepare the Moss:** Rehydrate sphagnum moss until it's damp but not dripping wet. 2. **Select and Cut:** Choose a healthy spiderette and cut it from the mother plant. 3. **Wrap the Base:** Gently wrap a small amount of damp sphagnum moss around the base of the spiderette, covering the root nubs. 4. **Place in Container:** Place the moss-wrapped spiderette in a small, clear container (like a plastic cup or a jar) to help maintain humidity. 5. **Monitor Moisture:** Keep the moss consistently damp. You might need to mist it periodically. 6. **Wait for Roots:** Once a good root system has developed within the moss (usually 3-6 weeks), you can gently transfer the spiderette and its moss to a pot filled with potting soil.Troubleshooting Common Propagation Issues
Even with the easiest plants, sometimes things don't go as planned. Here are some common issues and solutions when learning **how to propagate spider plant**: * **No Roots Developing:** * **Insufficient Light:** Ensure the spiderette is receiving bright, indirect light. * **Water Issues (for water propagation):** Water might be stale. Change it regularly. * **Temperature:** Too cold can slow down rooting. Keep the propagation area at a comfortable room temperature (65-75°F / 18-24°C). * **Immature Spiderette:** The plantlet might have been too small or not developed enough root nubs. * **Rotting:** * **Too Much Water/Humidity:** In water propagation, ensure only the base is submerged, not the leaves. In soil, avoid waterlogging. For moss, ensure it's damp, not soaking. * **Poor Air Circulation:** Especially when using plastic covers, ensure there's some airflow to prevent fungal growth. * **Contaminated Tools:** Always use clean, sterilized scissors. * **Leaves Turning Yellow or Brown:** * **Stress:** This can happen during the transition phase. Ensure consistent moisture and appropriate light. * **Chlorine/Chemicals in Water:** If using tap water, let it sit out for 24 hours to allow chlorine to dissipate, especially for water propagation. * **Poor Cut:** As mentioned, "The only ones that haven't made it were usually poorly cut/separated from the plant." A jagged or crushed cut can make it harder for the plant to recover. * **Cat Interference:** "I suspect my cat pulls them out and they lose contact with the soil," one gardener lamented. If you have curious pets, place your propagating plants out of their reach!Caring for Your Newly Propagated Spider Plants
Once your spiderettes have successfully rooted and are transplanted into soil, they need proper care to thrive: * **Light:** Place your new spider plants in a spot with bright, indirect light. They can tolerate lower light, but their variegation might fade, and growth will be slower. Avoid harsh, direct sunlight, which can scorch their leaves. * **Watering:** Water thoroughly when the top inch of soil feels dry. Spider plants prefer consistently moist soil but do not like to sit in soggy conditions, which can lead to root rot. Ensure your pots have drainage holes. * **Humidity:** While not strictly necessary, spider plants appreciate higher humidity. You can mist them occasionally or place them near a humidifier. * **Fertilizing:** Wait until your new plants have been established for a few months before starting a regular fertilizing schedule. Use a balanced liquid fertilizer diluted to half strength during the growing season (spring and summer). * **Potting:** As your spider plant grows, you may need to repot it into a slightly larger pot. They generally prefer to be a bit root-bound, so don't rush to repot. * **Pest Control:** Keep an eye out for common houseplant pests like spider mites or mealybugs. Treat promptly with insecticidal soap if you notice any infestations. The r/houseplants community, a vibrant online hub where members share pictures and discuss all aspects of plant care, often highlights the simple joy of watching these plants flourish. Don't be discouraged if your plants don't look as perfect as some you see online; as one user shared, "I've been wanting to show this subreddit all of my plants but would stop myself in the past because they don't look as great as others." Every plant journey is unique, and the process of nurturing new life is rewarding in itself.Conclusion: Grow Your Green Oasis
Learning **how to propagate spider plant** is truly one of the simplest and most gratifying experiences in the world of houseplants. From the casual "feral gardener" who just "lightly pop those cute puppies off and put their little butts in water" to the meticulous plant parent, spider plants offer a high success rate and a wonderful opportunity to expand your green collection. Whether you choose the visual delight of water propagation, the straightforwardness of direct soil planting, or the hands-off approach of the mother plant method, you're now equipped with the knowledge to multiply your spider plants with confidence. So go ahead, snip those adorable spiderettes, and embark on your propagation journey. Share your successes, learn from any challenges, and enjoy the endless beauty these resilient plants bring to your home. Ready to fill your home with more lush greenery? Pick your favorite spiderette, gather your tools, and start propagating today! Have you tried any of these methods, or do you have a secret tip for successful spider plant propagation? Share your experiences in the comments below, or explore our other guides on expanding your houseplant collection. Happy propagating!- Cleaning Authority
- How To Draw A Dolphin
- John Wick 5 Release Date
- Copperhead Road Lyrics
- Alexander Emelianenko
How to Propagate Spider Plants Babies

How to Propagate a Spider Plant: A Step-by-Step Guide

3 Easy Methods to Propagate Spider Plant Babies
